We released this NASPi storage product, and we want to share with you the story behind it;

Appearance selection
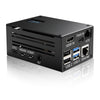
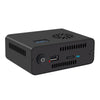
We have prepared several shell schemes: Considering the beauty, the difficulty of processing and the impact on WIFI, we finally chose the current scheme; the current shell shell wall thickness is 2.5mm, which is a moderate thickness, and the sturdiness has been Enough, the thickness of the front and rear panels is 1.5mm
The overall size of NASPi is as follows:

How to reduce the thickness of the shell?
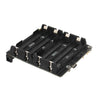
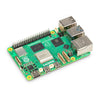
The thickness of the shell is our most important consideration in designing this product. The thickness of the shell is mainly composed of 2.5-inch hard disk, X823 expansion board and the thickness of Raspberry Pi 4. At the same time, we must consider the thickness occupied by the heat dissipation solution, so we gave up supporting ultra-thick hard disks such as 12.5mm thick and 15mm thick hard drives. NASPi supports hard drives with a thickness of no more than 9.8mm. It should be noted that the thickness of most 2.5-inch SSDs on the market is only 7.5mm.
How to improve the wifi signal?
Since the Raspberry Pi 4 has newly added USB 3 and the Raspberry Pi 4 still uses the onboard antenna, this will cause serious interference to 2.4G wifi during high-speed transmission of USB3, and even USB keyboards or mice will affect 2.4G wifi. Produce interference.
We have made a lot of efforts to improve the convenience of wifi, from X856 to X857, from X872 to X873, from X825 V1.1 to V1.5, and then to X825 V2.0. We have been working hard to improve wifi.
Back on NASPi, we redesigned the X823, using a 4-layer board design, optimizing the hardware circuit, and at the same time, we also carried out some optimization designs on the metal shell: for example, a lot of holes were added near the WIFI module for convenience. wifi. At the same time, we also consider using acrylic board material to make the front and rear panels;
After our test, we found that we basically solved the 2.4G wifi signal problem on NASPi.
We recommend users to use Ethernet or 5.8G wifi AP;
We have seen improvements made by the Raspberry Pi Foundation on CM4. On CM4, the Raspberry Pi Foundation abandoned the on-board antenna and used an external antenna with an IPEX interface.
How to solve the heat dissipation problem?
The heat dissipation scheme is never a separate topic. It needs to consider the overall height of the NASPi, the complexity of assembly, and the efficiency of heat dissipation. Finally, we used a custom metal fan bracket (we named X823-A3) and a 3-PIN PWM fan to dissipate heat to the NASPi; at the same time, we also reserved enough heat dissipation holes in all directions of the housing to keep Ventilation; we believe that this is not the best heat dissipation solution, but it is the low-cost and simplest heat dissipation solution.
How to lay out the interface of NASPi?
The layout of the product interface determines the overall appearance of a product. We use the X-C1 adapter board to transfer the interface of the Raspberry Pi 4 to the back of the case, and retain all the interfaces of the Raspberry Pi 4, so that the case will look neater At the same time, we have integrated functions such as power management and software safety shutdown on X-C1, and reserved 4-PIN switch interface early;
We consider simplifying the design in the next version X-C1
WIKI
https://wiki.geekworm.com/NASPi
Installation Video
Shell surface treatment
We used the process of sandblasting and then anodizing on the surface of the shell. Later, we will consider the surface drawing and then go to anodizing.
Ideas for the next version:
You are welcome to leave us your thoughts so that we can improve in the next version.




5 comments